The X2 mill is a popular entry-level machine for model engineers. It shares many features in common with the popular mini-lathes, and like them it can benefit from a number of relatively inexpensive and straightforward modifications that greatly increase its utility.
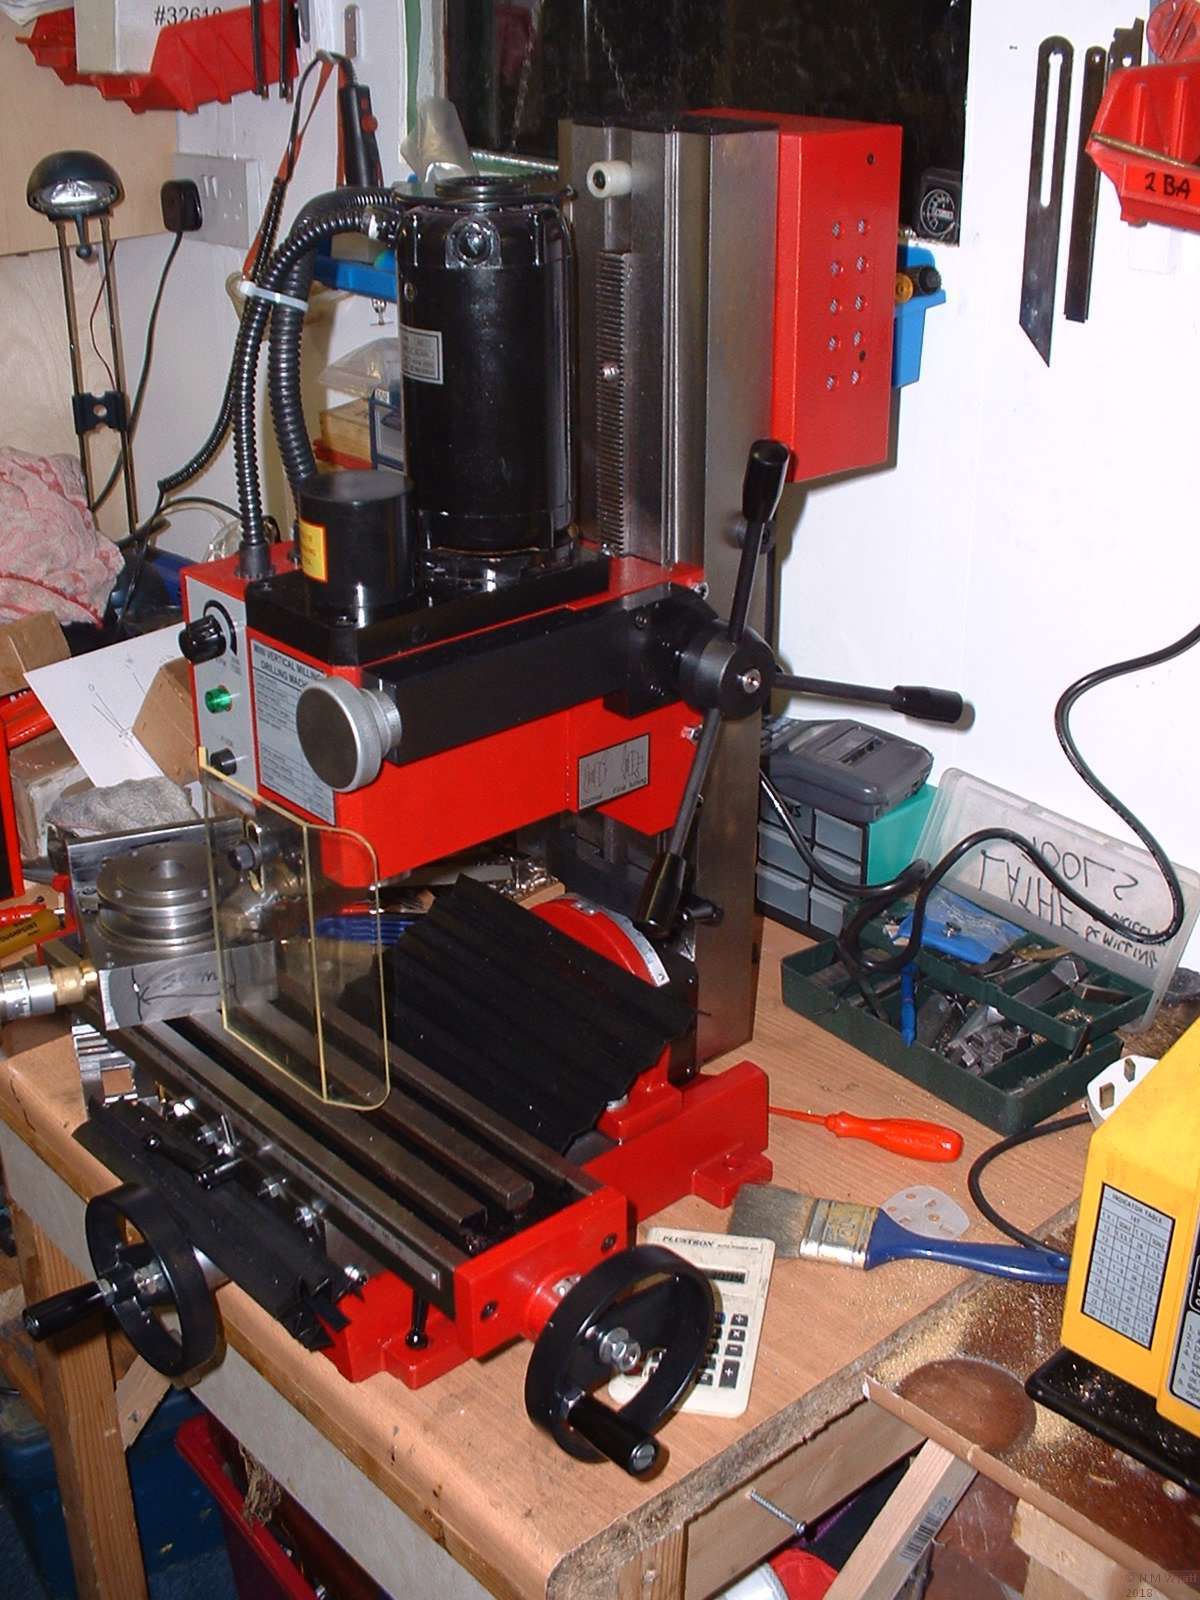
An X2 Mill in as received condition
The original design X2-style mills, as sold by many suppliers, share three shortcomings that limit the user’s ability to stretch the machine to its full potential. Firstly, the design of the bracket for the tilting column is poor, leading to a lack of rigidity; secondly the plastic drive gears in the gearbox can fail, especially when making interrupted or heavy cuts. These issues have been addressed by Arc Euro Trade’s new ‘super X2’ which has a brushless DC motor which does not need the two-speed gearbox as well as, unique to Arc, a more rigid, non-tilting column. This new version also has a larger table derived from the X1 mill. The third issue is that, as standard, the X2 mills are fitted with the same deep groove ball bearings as mini lathes. Because these bearings are not designed to take preload or heavy axial (along the spindle) loads, this arrangement is not ideal for either a lathe or a mill, potentially affecting surface finish. A roller bearing conversion for mini-lathes is a popular upgrade. Unfortunately roller bearings are not an ideal solution for the X2, due to their greater thickness which means they are not really suitable for the existing lathe spindle.
The good news for owners of the old-style X2 mills is that there are now tried and tested solutions to all three of these issues, which can allow owners of the ‘old style’ X2 mill to achieve its potential. This page looks in detail at the first, and most significant shortcoming - rigidity.
Rigidity
The column of an X2 mill is mounted onto the base via a right-angle bracket. It is clamped to this by a very large nut and bolt, tensioned against a belleville washer. This arrangement allows the column to tilt left and right, and after any disassembly the vertical adjustment of the column needs to be checked, as described later.
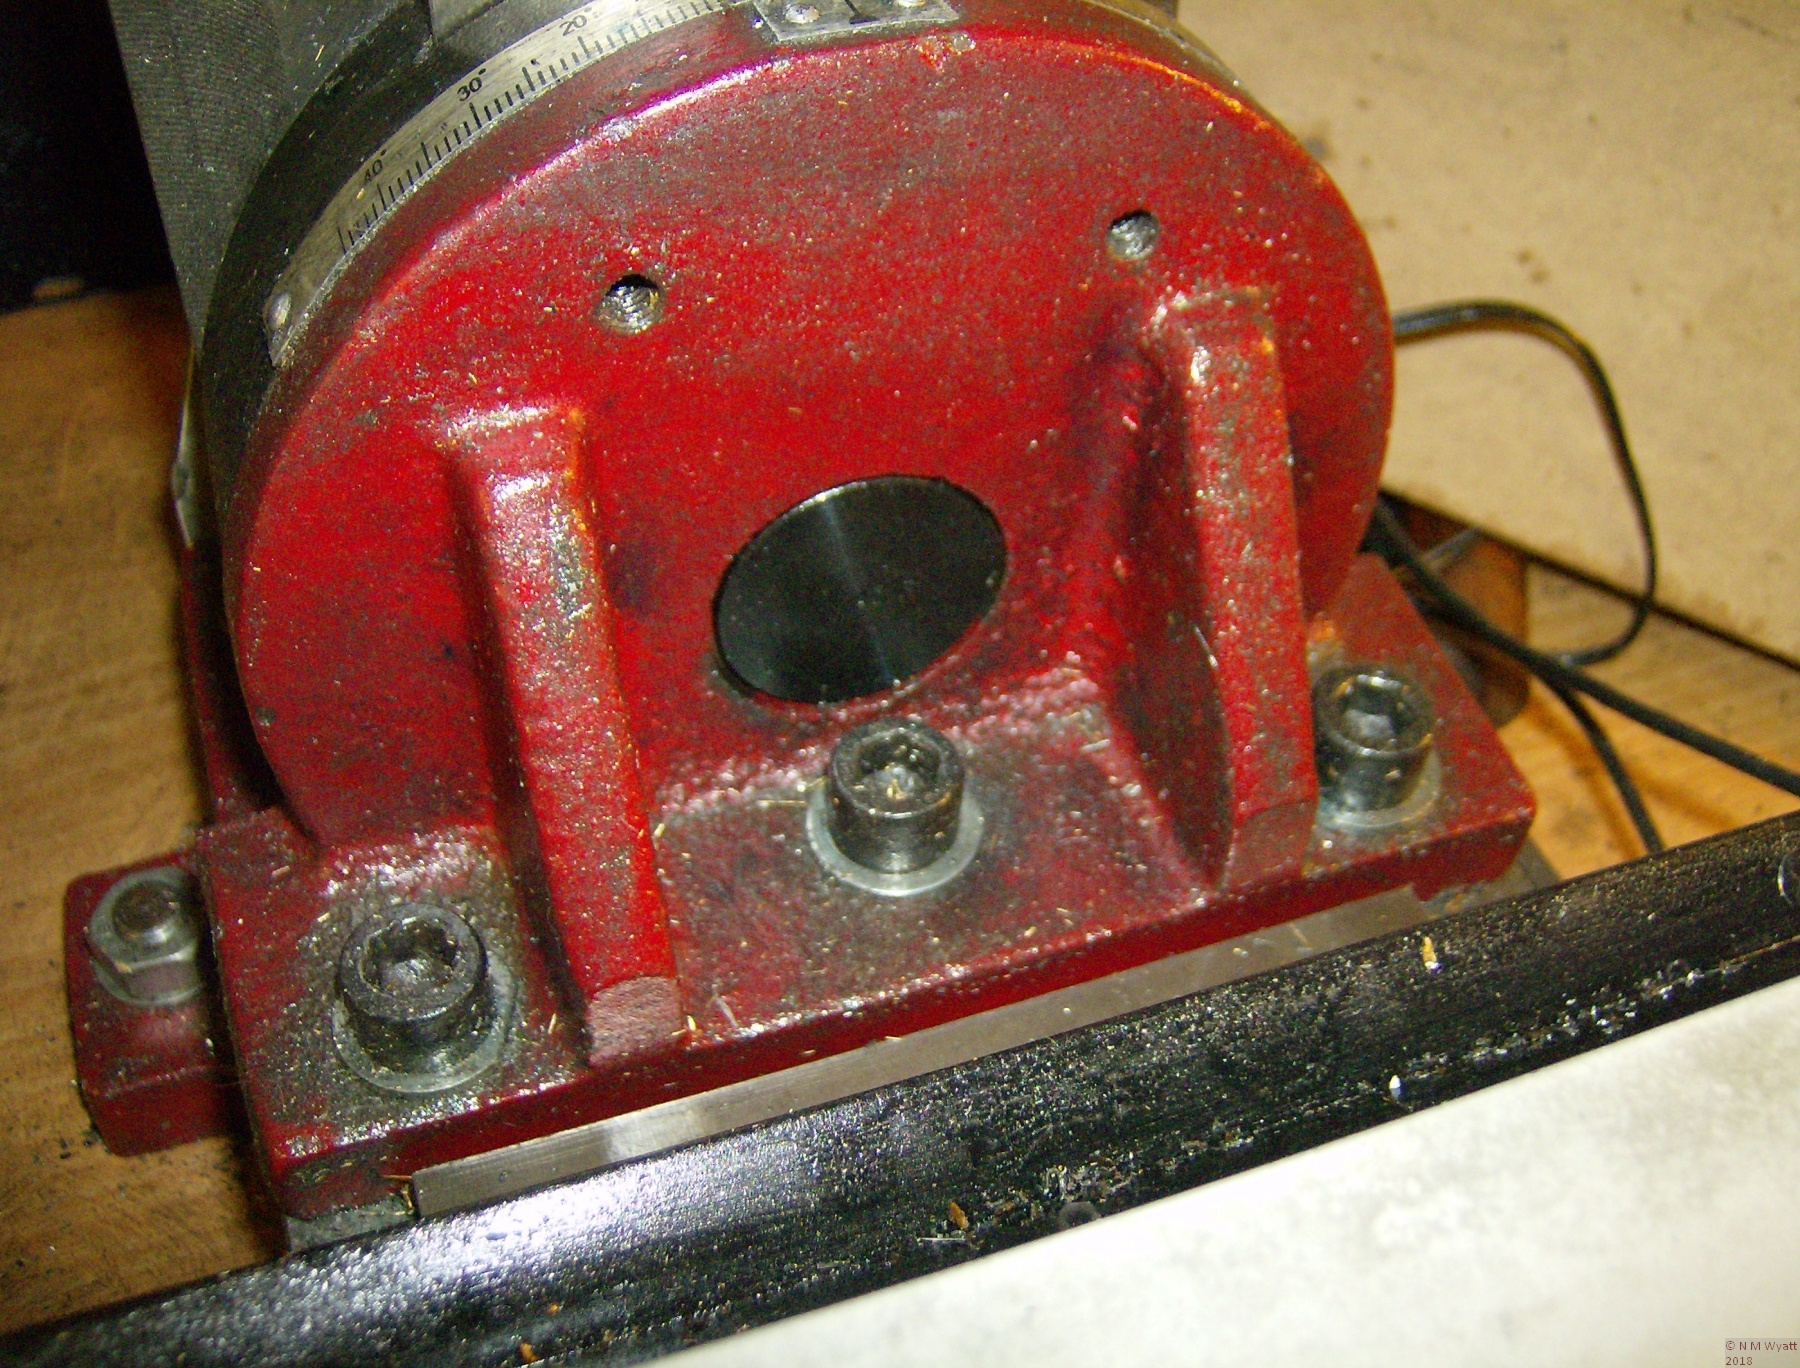
The sheer size of these fixings appears to prevent any problems - the column is solidly attached to the bracket. It is the less obvious joint between the bottom of the bracket and the base of the mill where issues arise. The fixing bolts for the bracket are all along one edge, virtually in a straight line.
The three fixings in a straight line
This means there is poor resistance to flexing at the joint. This situation was not helped by (on my machine) a poorly machined finish to the mating surfaces, which also manifested itself in a slight fore-aft error in the alignment of the column. Because of the geometry of the mill, just tiny movement at this joint can be magnified into discernible movement at the tool tip.
Testing Alignment of the Column
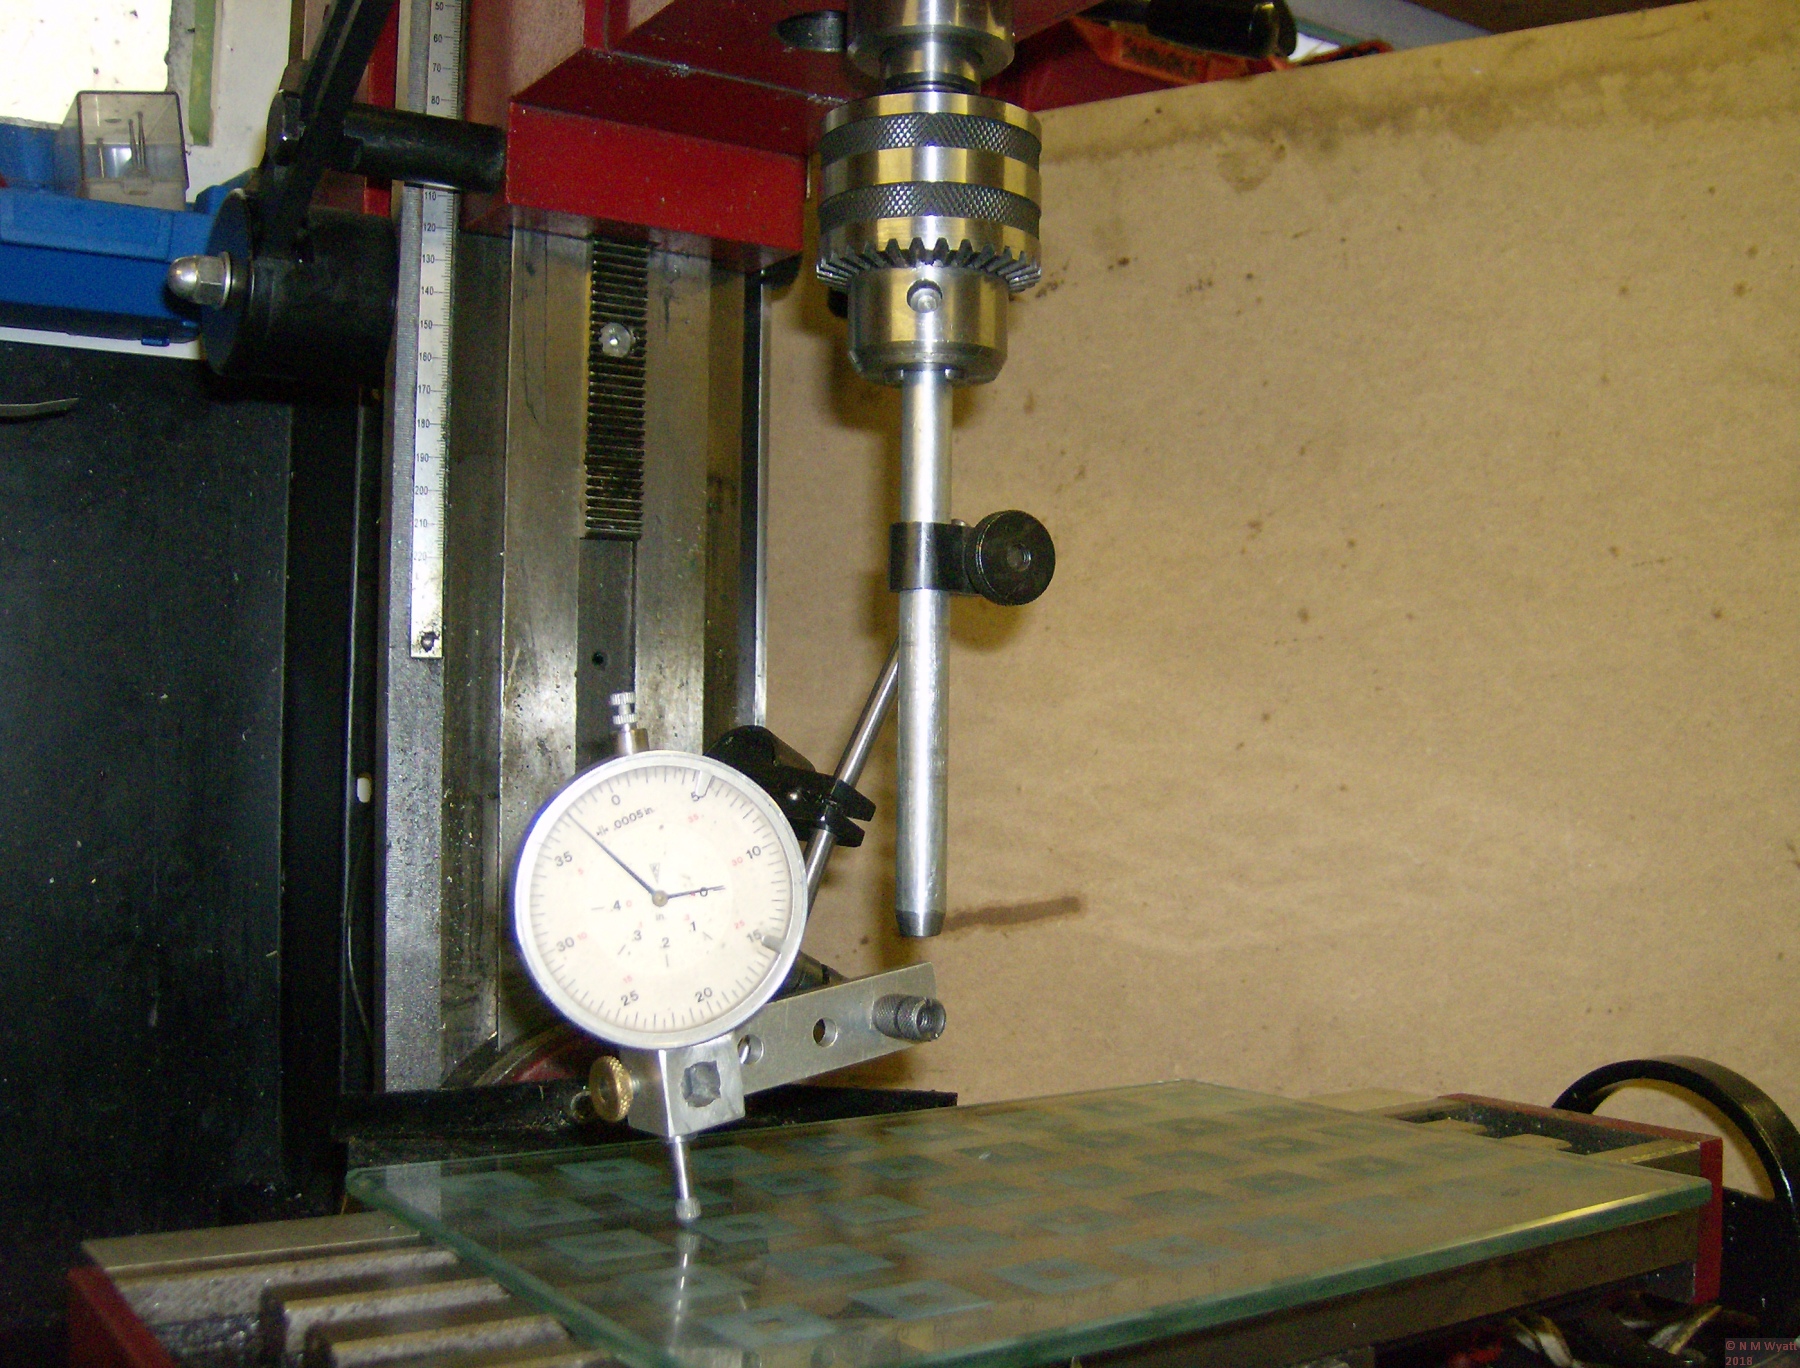
Start by switching off and cleaning up the mill before you start. The fore and aft (and sideways) alignment of the column can be tested by fixing a dial indicator off a bar held in the spindle –by a chuck or collet, the accuracy doesn’t matter in this case. Place a piece of clean, flat glass on the mill table beneath the spindle and adjust the indicator so its tip rests on the glass. Set it up so that when you rotate the spindle the indicator traces a circle 6-9 inches in diameter on the glass. Movement of the needle will rapidly demonstrate any errors in side to side or up and down alignment of the spindle. Deflection when the head is gently pushed will highlight any lack of rigidity. Expect greater deflection under back and forth pressure than side to side – this is the problem we will now tackle.
Tramming the Mill column
This process is one you should carry out every time you move the column off the vertical and then back again. You should also do it as a check from time to time, especially after heavy or interrupted cutting or if the finish you get shows the uneven signs of an out-of square cutter.
Improving the Fit of the Mounting Bracket
The first step to increasing rigidity is to scrape the bottom of the mounting bracket to a better fit on the base. If you column has perfect fore and aft alignment and no obvious flex under light loads, then you may not wish to do this, so jump straight to the section on making a stiffener plate. If you wish to scrape in the bracket start by removing the concertina shield between the table and the column. You can now see the three screws that fix the bracket in place, but leave them alone for now. Proceed by removing the mill head from the column. This is done by first unscrewing the white nylon bumper at the top of the column and loosening off the gib strips. Now you can support the head and carefully disconnect the spring counterbalance and wind the head right up and lift it free. You can then loosen off the big nut at the back of the column, remove the dished belleville washer and lift the column free. It is quicker to work keeping the head attached to the column, but I don’t advise this, as the combination is very heavy, unless you have someone to help with lifting it in and out of position. Whichever way you work, do not leave the column unsupported whenever the securing nut is not fully tightened.
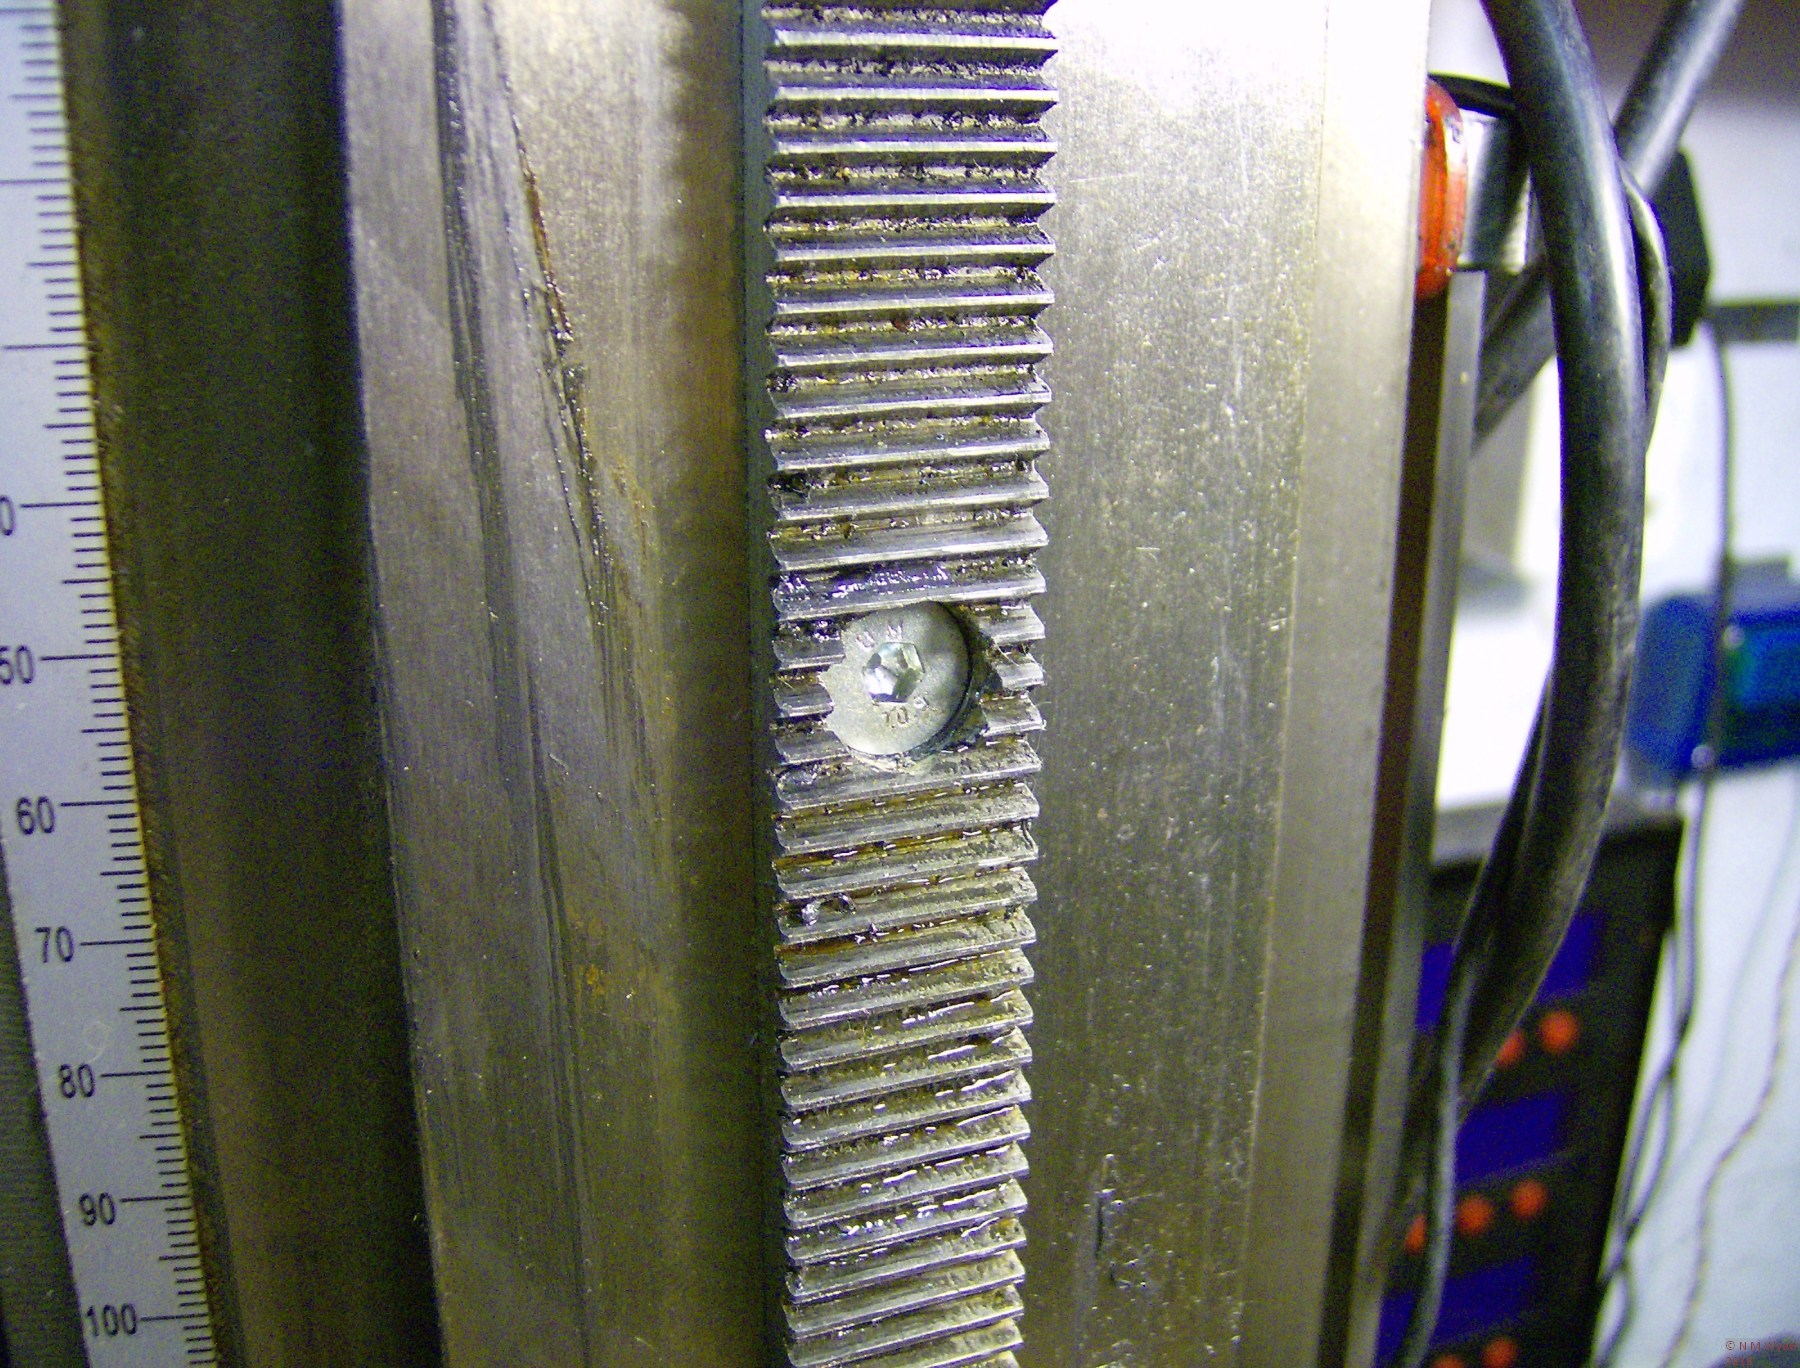
This is a good moment to ensure that the rack attached to the column is firmly screwed in place. It is not unusual for the two M6 countersunk screws to become loose.
Rack on the Column
With the column carefully set aside, you can now unbolt the bracket. The starting point for addressing the rigidity problem is by carefully scraping the joint between bracket and base to a much better fit. Unfortunately, I didn’t record this process with pictures. Using engineer’s blue; this is not the same as marking out blue, it is a fine intense paste that doesn’t dry - I use ‘Stuart’s Micrometer Paste’, traditionally one tin lasts a lifetime. Apply a very thin layer to the bottom of the bracket, then put the bracket in pace on the base and move it around in small circles. The blue will transfer to the areas where the two surfaces are in contact. For my mill, it was clear contact was limited to only about a quarter of the joint, mostly near the screw holes. This made it relatively easy for the column to tilt.
If you carefully scrape away metal from these areas, and keep repeating the process, eventually you will end up with both surfaces having excellent contact across a much larger area. Traditionally scraping is done with specialist tools and leaves a highly decorative pattern on the metal. In this situation, I just wanted to increase the area of contact and was not worried about making a pretty pattern. I used a broad-ended HSS parting tool, temporarily mounted in a wooden handle. To my surprise I found that the tool needed regular honing to keep it sharp and cutting freely.
This is the tedious bit – you MUST keep assembling the mill and checking the fore and aft alignment of the column at regular intervals. Again, do this with a dial gauge mounted from a bar held the mill, so that it can be rotated by hand in a circle over a sheet of flat glass placed on the milling table. The gold standard is when the needle of the gauge shows no movement during an entire circle. What you are aiming to do is minimise errors across a cut, so bear in mind that even a couple of thousandths across an eight inch circle may be undetectable at the diameter of a typical milling cutter.
It is obviously possible to remove too much material from the front or back of the contact patch, so take care. In my case, I already knew my column was tilted backwards slightly, and I was able to bias the removal of metal so that as well as increasing the size of the contact patch, I corrected this small, but irritating, error of alignment. It is always easier to work with a bias one way or another, than just improve the fit of two surfaces that are already aligned.
Because of the need to reassemble and break down the mill for the checks, this procedure took several hours work, taking it very gently. Both the air and my hands were thoroughly blue by the end of the process, but I got the contact patch up to about 75-80% and much better distributed. The difference in rigidity of the mill was surprisingly noticeable.
Fitting a Stiffening Bracket
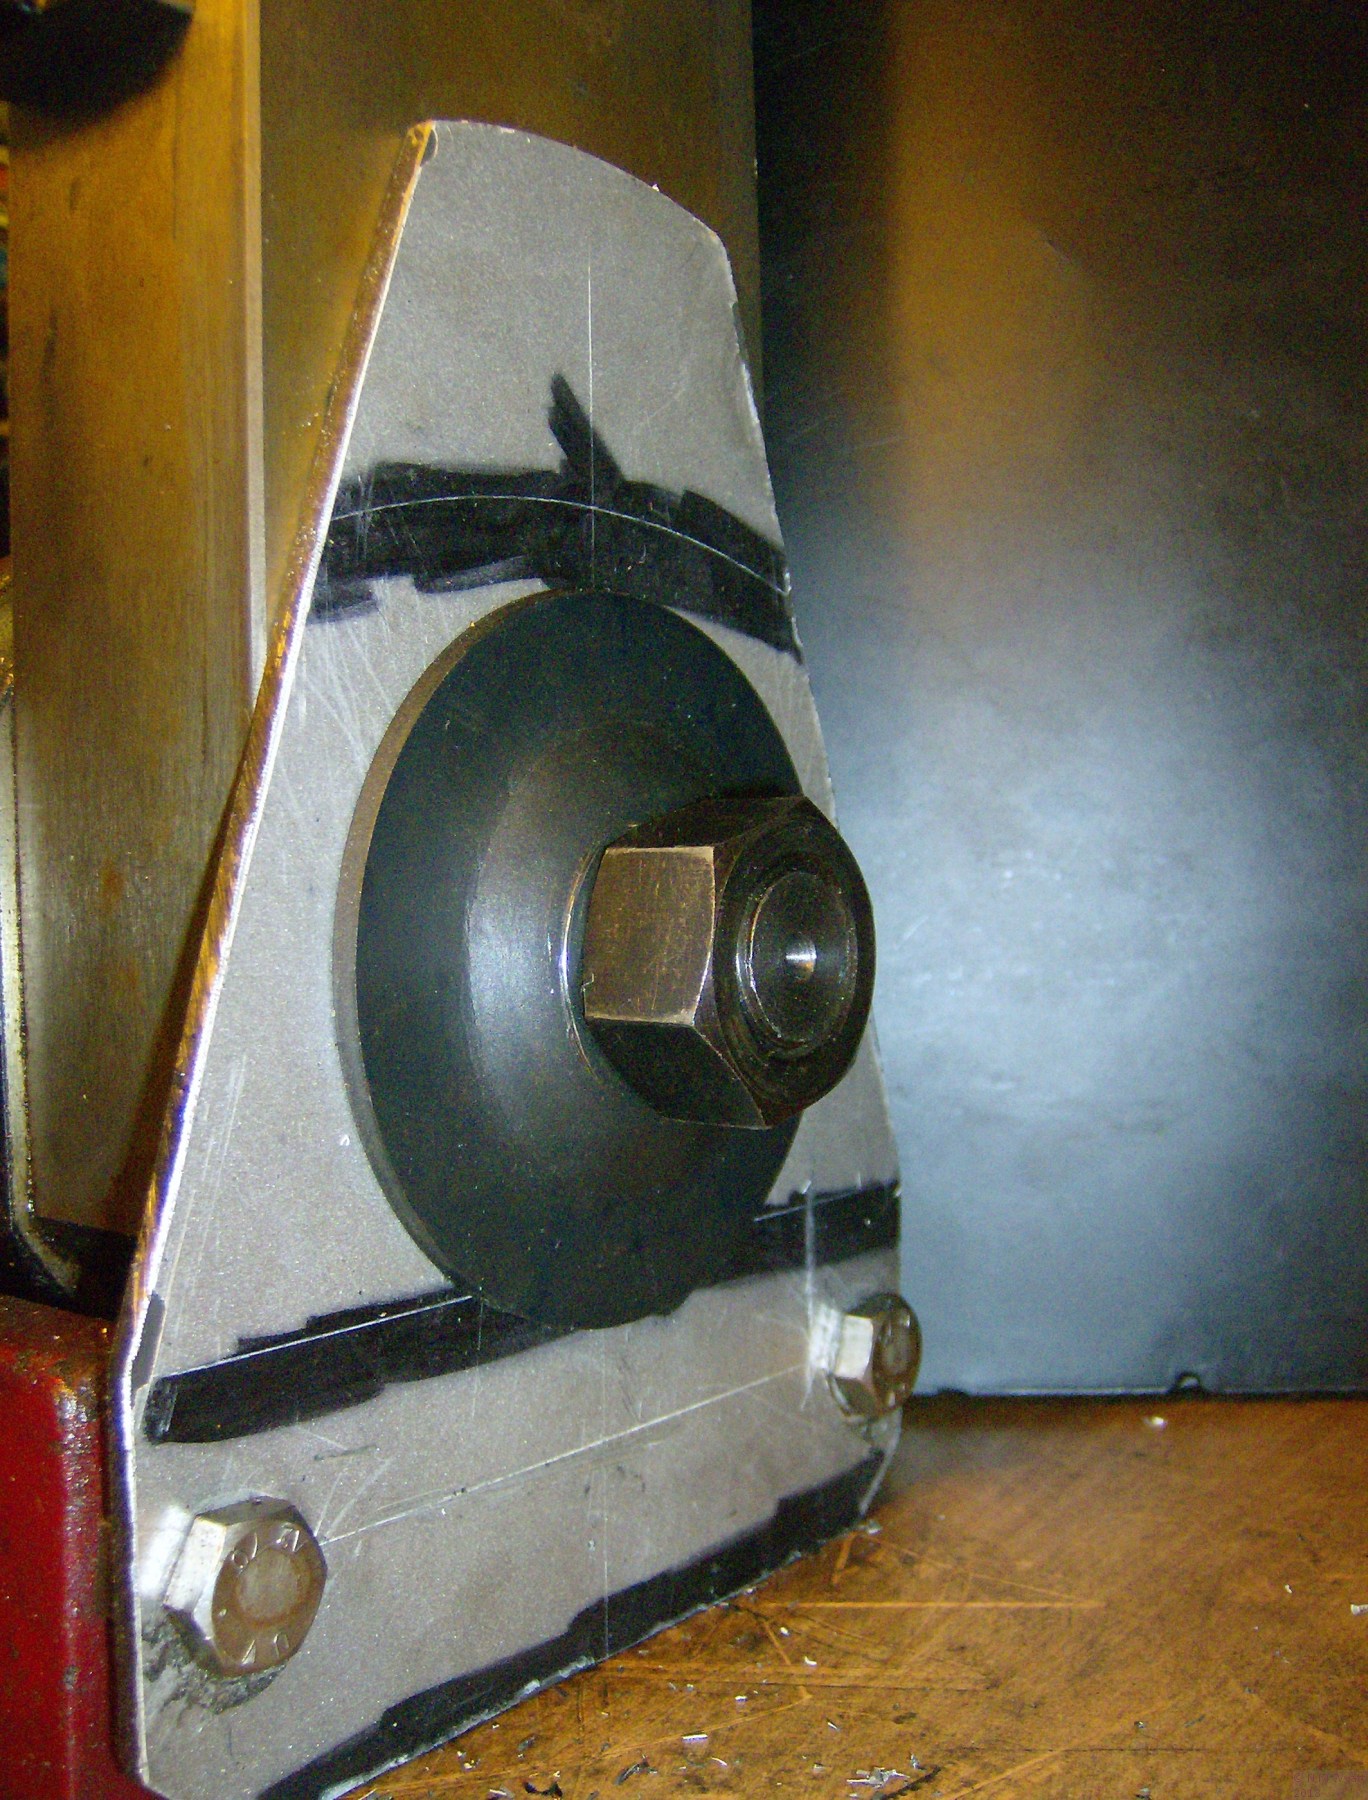
The final step to completely stiffen up the mill is much simpler, and some as some users have found it solves all their problems without the effort of scraping in the bracket. If your mill already has good fore and aft alignment, you may wish to just take this step. The solution is just a simple stiffening plate at the back of the column. There are examples a good 1/2 thick, while others have had success with steel plate down to 3mm thick. I made mine from 5mm steel from an old loudspeaker stand, and I would suggest that this is probably as thin as you should go.
The stiffening plate fitted to the back of the X2 Mill
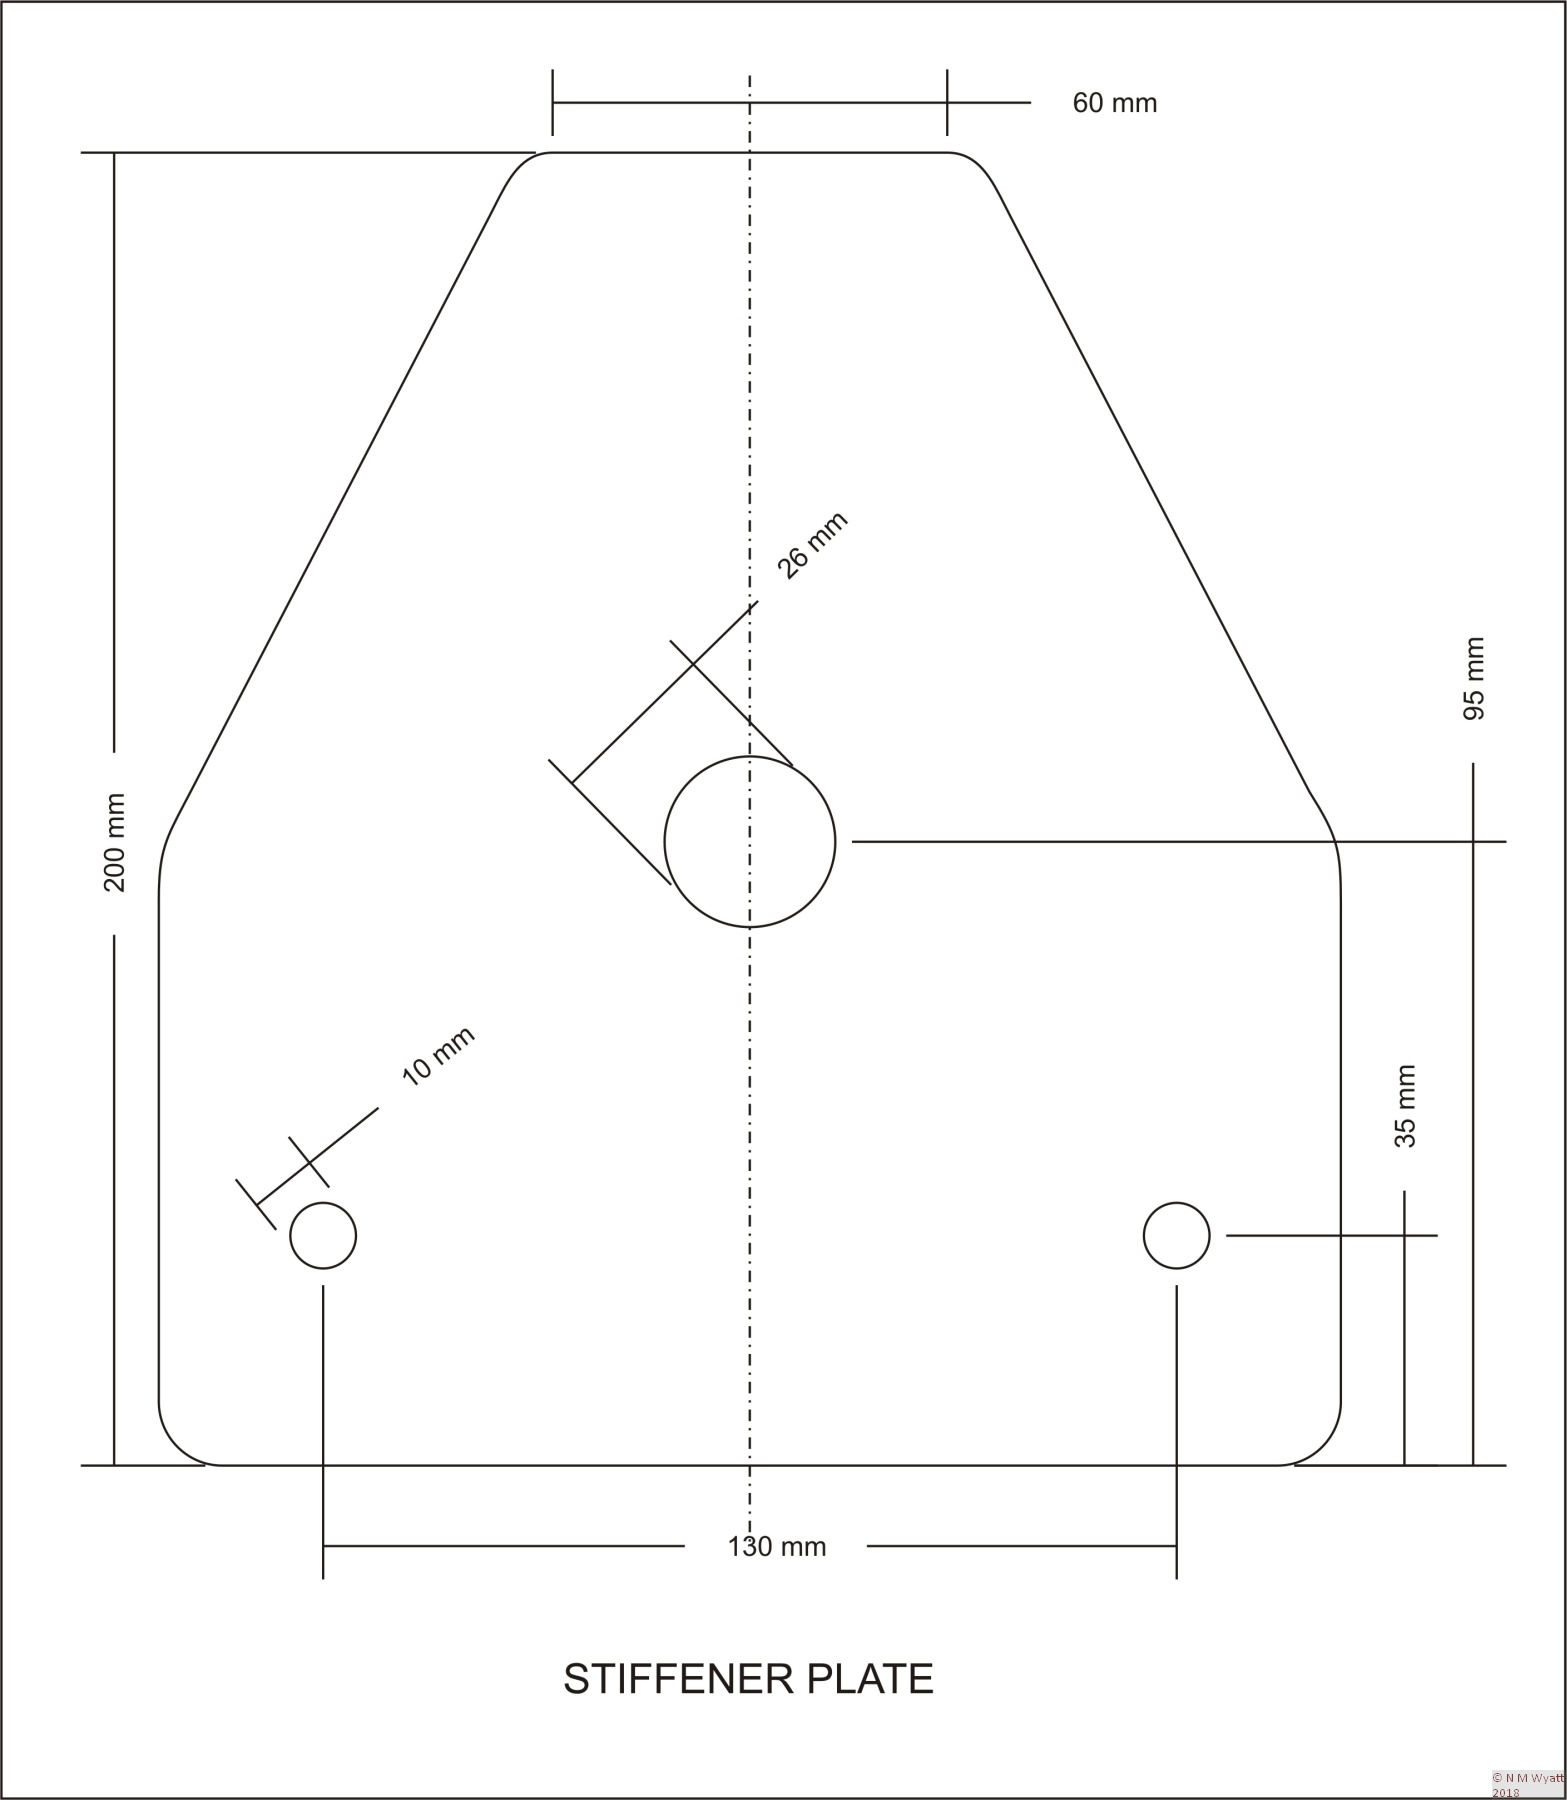
The plate is roughly triangular (the shape is not important) and with three holes. The largest hole is for the bolt which takes the belleville washer and nut at the back of the column. The two 10mm holes are for high tensile bolts into the back of the base of the mill. The dimensions are not critical, and you should make the plate to fit your mill, but here are the measurements for mine:
Dimensions for an X2 Mill Stiffening Plate
I suggest checking under the base of your mill to check the best place to drill and tap the M10 holes, as machines may differ. Look for a place where there is plenty of ‘meat’ in the casting. If you make the holes in the plate tapping size for M10 first, you can then hold it in pace with the big nut and spot through to mark the base casting. You will probably need to use a portable drill for these holes as the mill base is unlikely To fit on the table of most drilling machines. I found the cast iron base drilled and tapped freely, even at these large sizes. As you won’t be able to use a tapping guide on the angle surface, it is very important to start with the taper tap. Although it is tempting to skip its use on softer materials, for larger holes the long, slow lead on a taper tap guides its somewhat making it easier to tap a square hole.
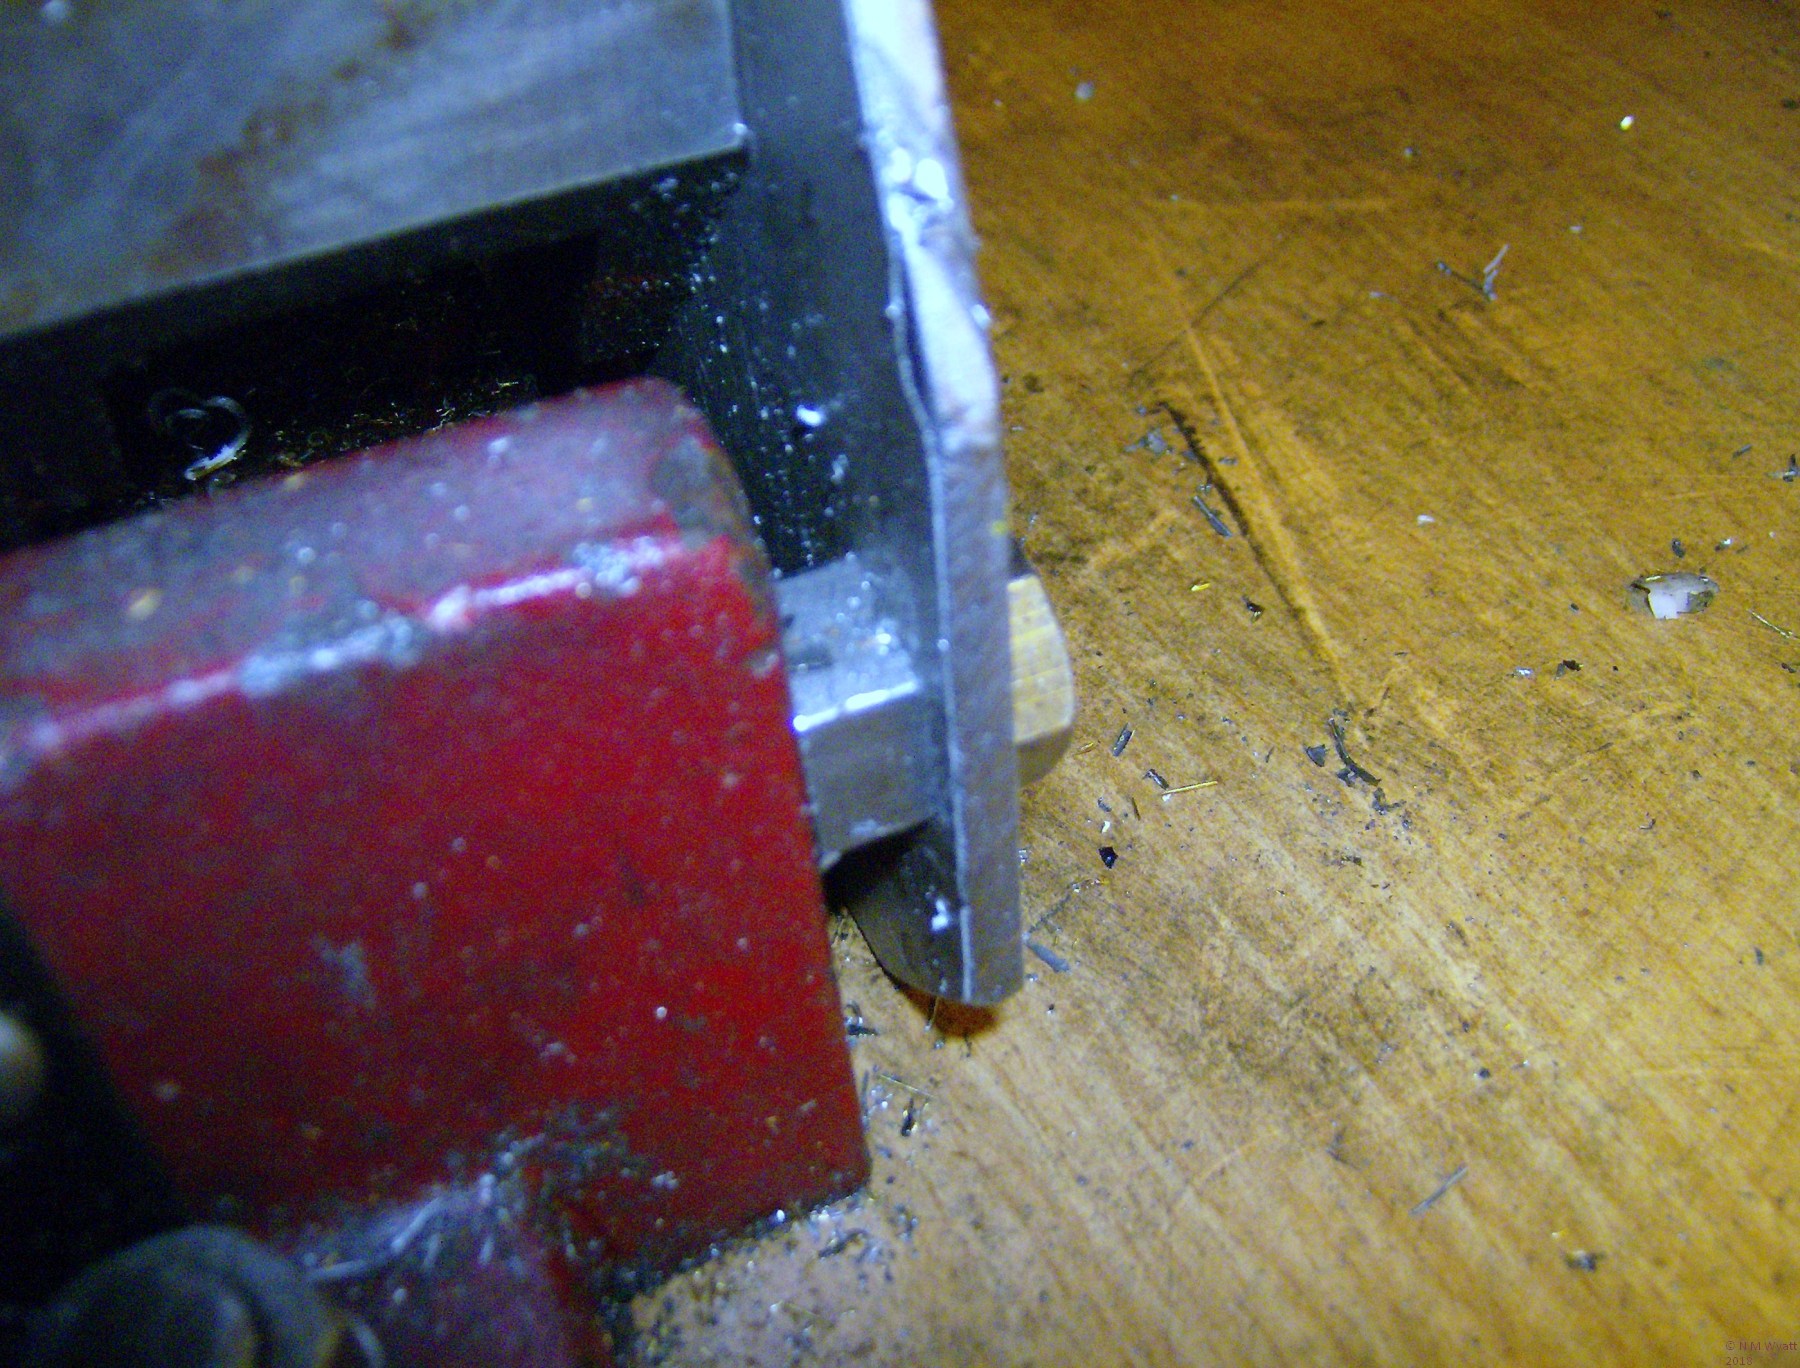
Before fitting the two M10 screws, you need to make some shaped spacers to fit between the plate and the base of the mill. Because castings vary, you will have to shape these by hand. File them so you can push them into place with their central hole lined up with those in the base and the plate. If you drill the centre hole oversize, this will compensate for any small misalignment.
Spacer fitted between the plate and the base of the mill
Open up the holes in the plate to 10mm, and refit it tightening up the two M10 screws first, before finally tightening up the big nut at the base of the column. Note that this brace is not taking any great load, its job is just to remove any tendency for the back of the column to move up or down.
Scraping had brought my mill into good alignment and helped with rigidity, but the fitting of a brace at the back of the mill made a huge improvement. Now the mill was more rigid I could take better advantage of the machine’s capability and take bigger cuts. I proceeded to mill some reasonably tough steel using a 11.5mm slot drill. The chips flew far and wide, but Murphy’s law decreed that the extra load this put on the gears resulted in their disintegration into a little pile of small white chunks.
This page is based in part6 on my article for Model Engineers' Workshop magazine.

